
Wisp crochet pattern

I haven’t posted anything on my website for a while sooo I thought I’d add an old pattern for free.
Wisp is one of the many Animal Crossing characters I made back in 2020. I haven’t actually played New Horizons since then - just Pocket Camp. This pattern is pretty easy & straight forward, so I think it’s suitable for beginners. The mouth is the only “hard” part & there’s a tutorial linked that shows how to make it.
What I’ve been up to these past few months - got a puppy in July & named her Lily (after my favourite villager).
Took a break from instagram for a bit, which was nice & something I’d highly recommend doing.
Tried to work on improving my mental well-being. The past couple of years have been completely draining. I never stopped working during the pandemic - I actually worked more than I’ve ever worked. A combination of that + having to deal with a lot of rude people (which is understandable, everyone was stressed) really took a toll on my mental health.
Never stopped crocheting over the summer, instead I just started working on sweaters & other projects.
More recently I’ve been trying to update older patterns. Old, like, from when I started writing patterns several years ago. So far I’ve updated Lapras & have been working towards updating some other ghosts as well as items & patterns for fall & winter. My craft room is an absolute mess.
Here’s an advertisement to help feed my cats:
MATERIALS &TOOLS
• Yarn: beige, light grey & white (**less than one skein of each**
Caron Simply Soft “Autumn Maize” & Red Heart Soft “Light Grey
Heather” & “White”)
• Crochet hook (3.5mm/any size; consistent though out pattern)
• Polyester stuffing
• Scissors
• Sewing needle
• Stitch marker
• Pins
• Felt or wool: black
• Needle felting tool (if needle felting) & glue/thread (for felt)
• A small amount of black yarn or black embroidery floss
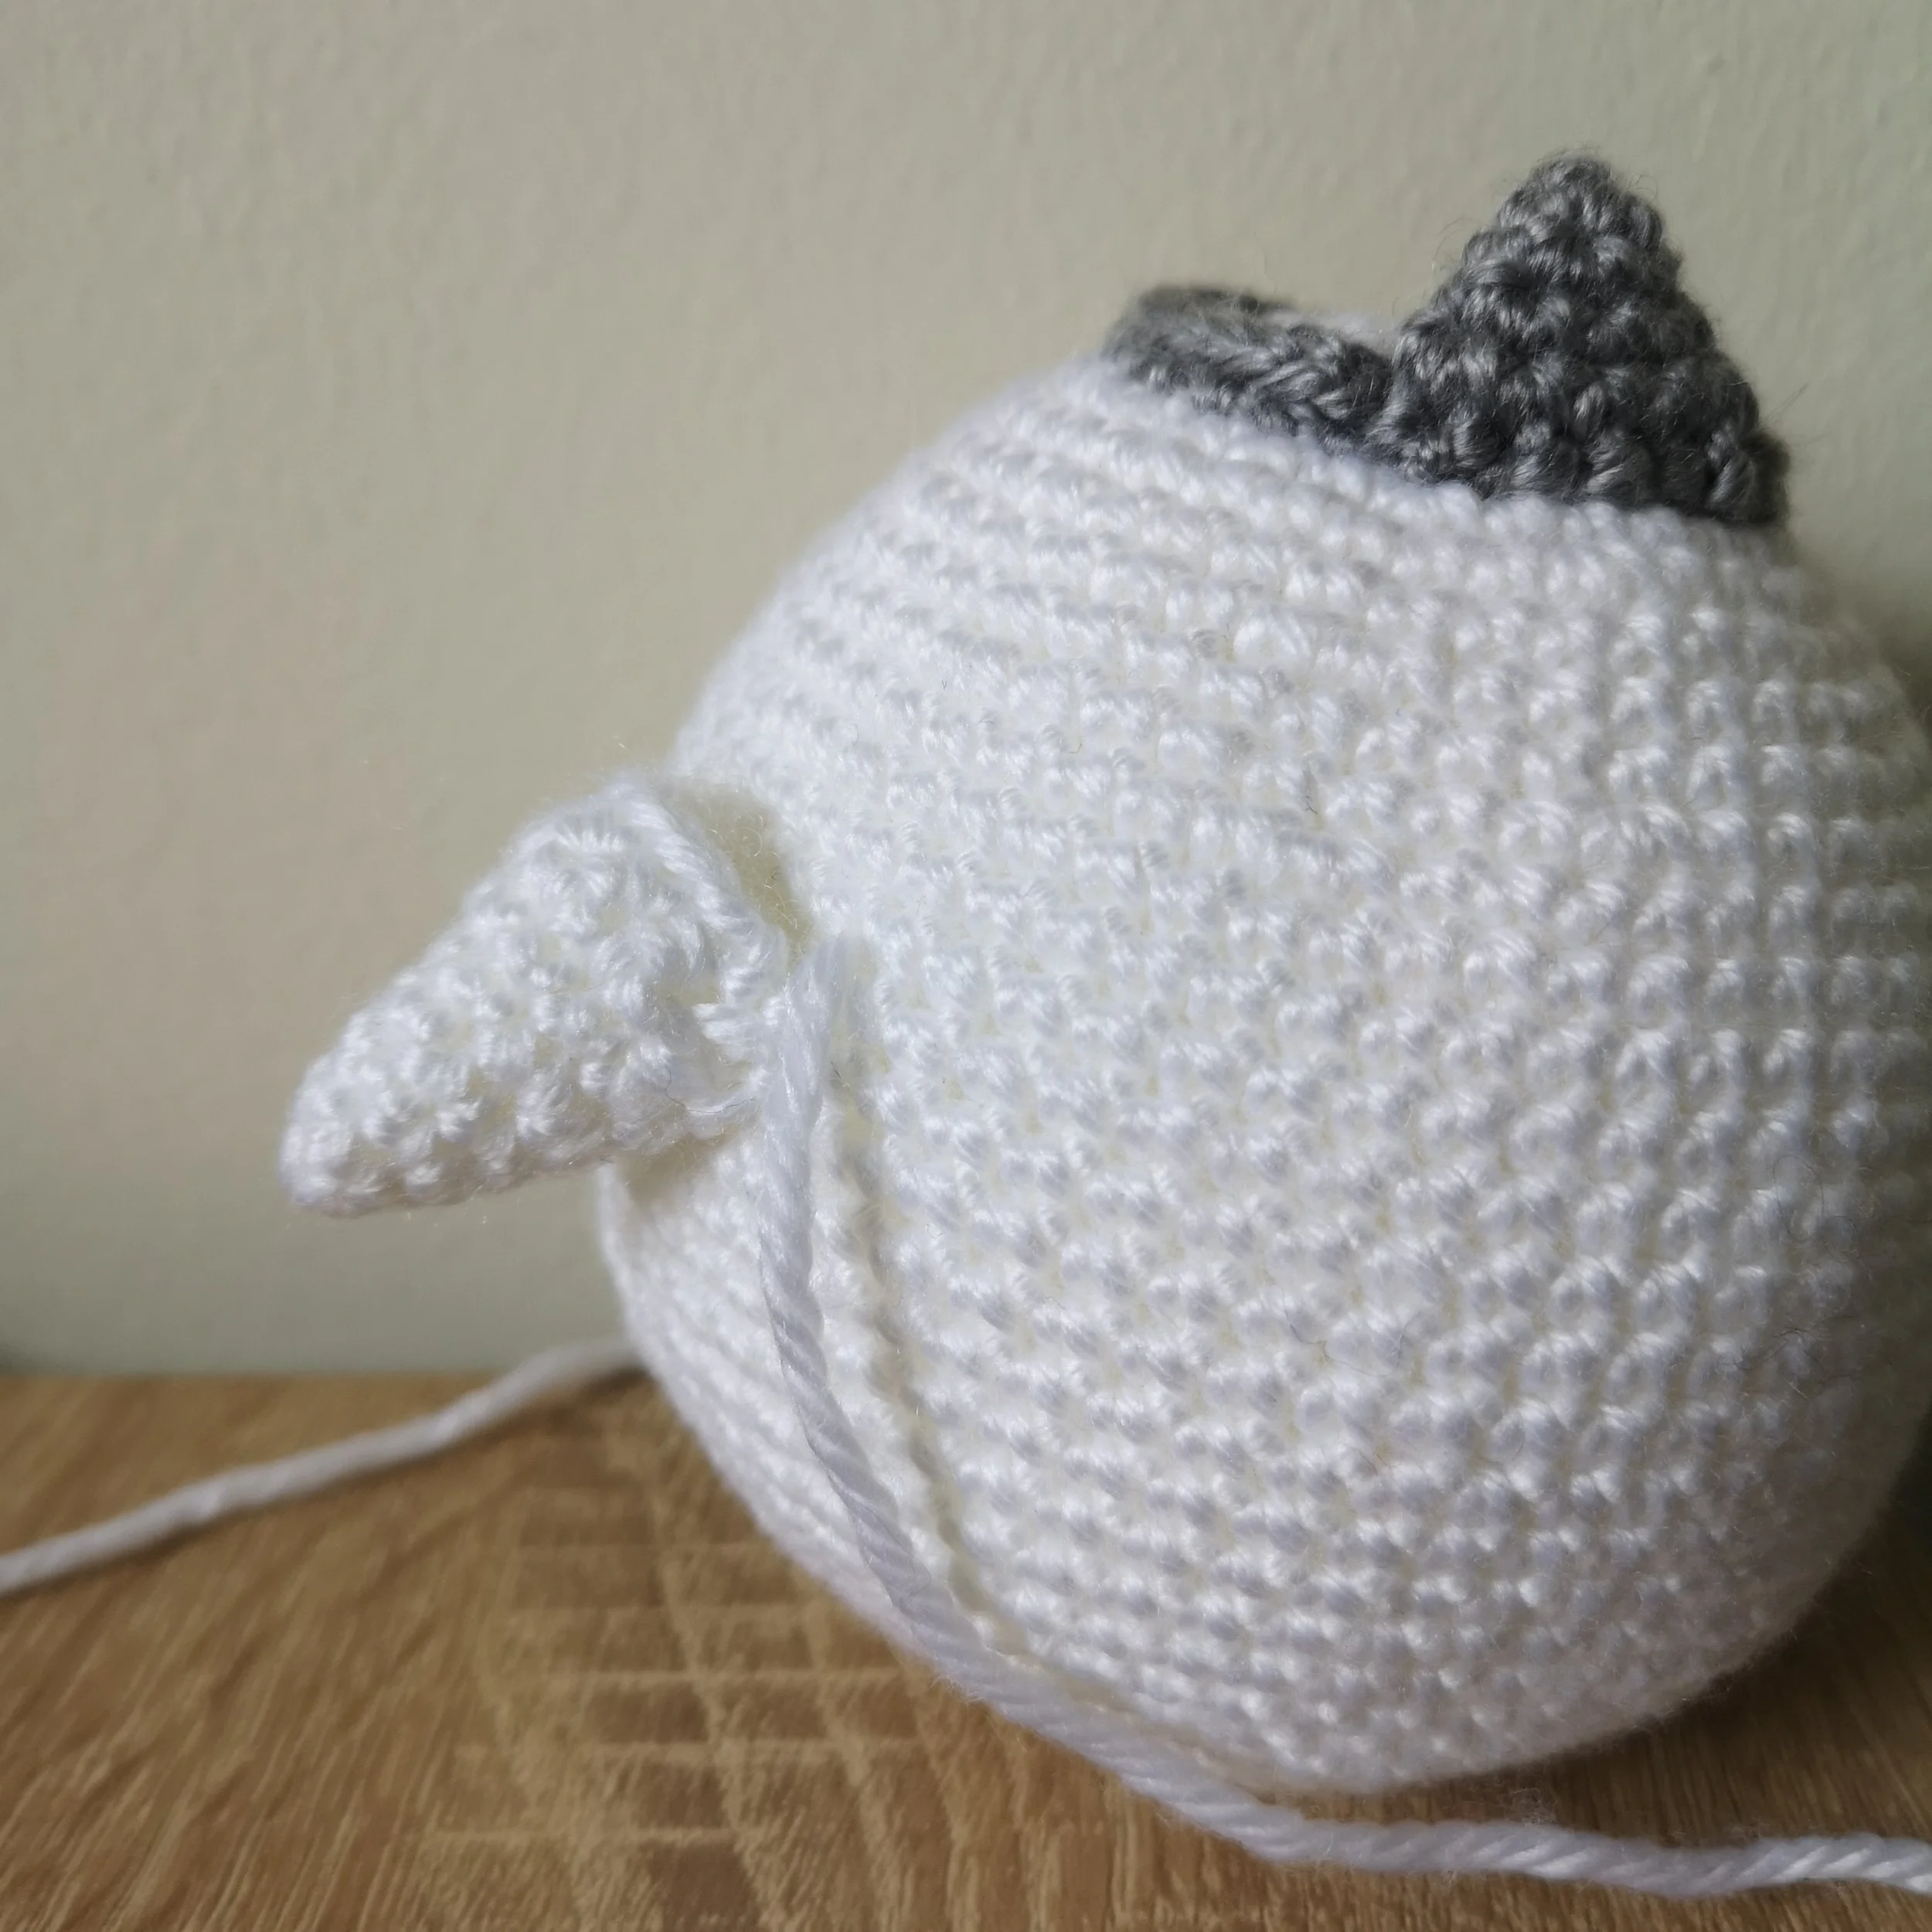
Head&Body
Made in white
1. Make 6 sc in a magic ring (6)
2. inc x 6 (12)
3. (sc, inc) x 6 (18)
4. sc, inc, (2 sc, inc) x 5, sc (24)
5. (3 sc, inc) x 6 (30)
6. 2 sc, inc, (4 sc, inc) x 5, 2 sc (36)
7. (5 sc, inc) x 6 (42)
8. sc around (42)
9. 3 sc, inc, (6 sc, inc) x 5, 3 sc (48)
10. sc around (48)
11. 9. (7 sc, inc) x 6 (54)
12. 4 sc, inc, (8 sc, inc) x 5, 4 sc (60)
13-24. sc around (60)
25. 4 sc, dec, (8 sc, dec) x 5, 4 sc (54)
26. (7 sc, dec) x 6 (48)
27. sc around (48)
28. 3 sc, dec, (6 sc, dec) x 5, 3 sc (42)
29. sc around (42)
30. (5 sc, dec) x 6 (36) – add stuffing
31. 2 sc, dec, (4 sc, dec) x 5, 2 sc (30)
32. (3 sc, dec) x 6 (24)
33. sc, dec, (2 sc, dec) x 5, sc (18)
34. (sc, dec) x 6 (12)
35. decrease six times (6)
Fasten off, leaving a tail. Weave the tail through the front loop of the remaining stitches & pull
to close the ring.
Arms
Make two arms in white
1. Make 4 sc in a magic ring (4)
2. inc, sc, inc, sc (6)
3. 2 sc, inc, 2 sc, inc (8)
4. sc around (8)
5. 3 sc, inc, 3 sc, inc (10)
6. 2 sc, inc, 4 sc, inc, 2 sc, ch1, turn (12)
7. dec, 4 sc, dec, ch1, turn (6)
8. sc 6 (6)
Fasten off, leaving a tail to sew to the body. Add stuffing to the arms.
Hat
Made in light grey
Front:
1. Make 6 sc in a magic ring (6)
2. sc, inc, 2 sc, inc, sc (8)
3. 3 sc, inc, 3 sc, inc (10)
4. 2 sc, inc, 4 sc, inc, 2 sc (12)
Fasten off, leaving a tail to sew to the head.
Rim:
1. Start by leaving a tail to sew to the head & chain 25. Starting in the second chain from the
hook: sc 24 (24)
Fasten off.
MOUTH
In beige - made in an oval shape
1. Chain 14. Starting in the second chain from the hook: inc, 11 sc, *make 4 sc’s in the last
stitch*. Turn the piece so you’re working on the other side of the foundation chain: sc, dec, 5
sc, dec, sc, inc. Slip stitch to the first stitch (28)
Fasten off, leaving a long tail to sew to the head/body
Tail
Made in white
1. Make 4 sc in a magic ring (4)
2. sc, inc, sc, inc (6)
3. inc, 2 sc, inc, 2 sc (8)
4. (sc, inc) x 4 (12)
5. (sc, inc, sc) x 4 (16)
6. (3 sc, inc) x 4 (20)
7. 6 hdc, inc, 2 sc, inc, 6 sc, inc, 2 sc, inc (24)
Fasten off, leaving a tail to sew to the body. Add stuffing to the tail.
ASSEMBLY
· Sew the front piece of the hat between rounds 5&6 of the body.

· Sew the rim of the hat in the remaining stitches between rounds 5&6 of the body.
· Stuff the arms & sew them between rounds 15&16 of the body.
· Stuff the tail & sew it to the back of the body. The half double crochets should sit between rounds 28&29 of the body.
· Sew the mouth to the head/body. One side of the mouth should have 9 stitches in the middle – that side should be at the top & sit between rounds 17&18 of the head.

· Using a piece of black embroidery floss or black yarn, embroider a line over the middle of the foundation chain on the mouth.
· Using a piece of grey yarn (the same used for the “hat”), embroider an eyebrow between rounds 7&8 to between rounds 9&10 on each side of the head, approximately 5~ stitches apart. They should angle outwards towards the arms.
· If using felt: cut two ovals (approximately three quarters of an inch tall by half an inch wide) out of black for the eyes. Glue/sew them to the head one row below each eyebrow. The eyes should sit approximately 5~ stitches apart.
If needle felting: using black felt, create two ovals (approximately three quarters of an inch tall by half an inch wide) for the eyes. They should sit one row below each eyebrow & approximately 5~ stitches apart on the head.

