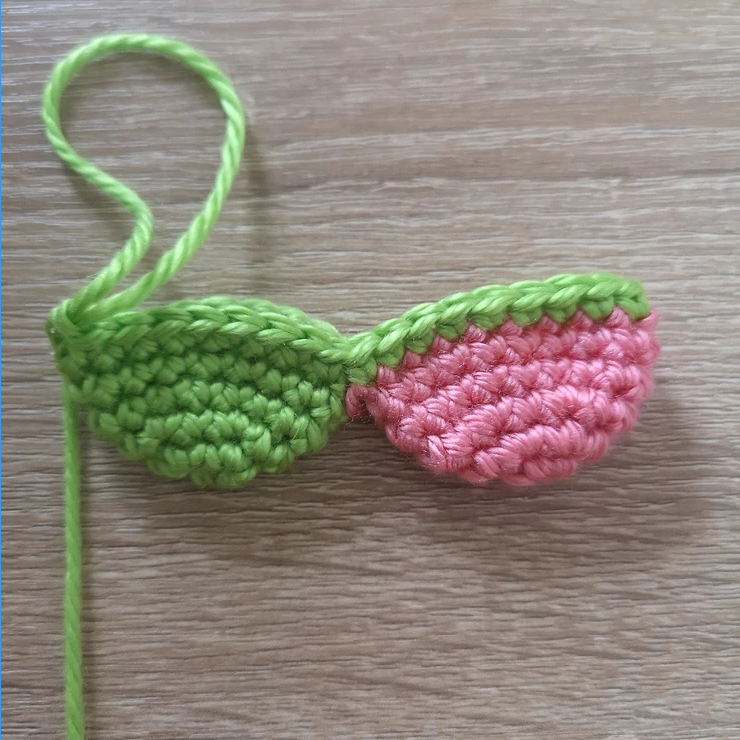
Joining Pieces
Joining pieces by crocheting around them can be really useful when you're making parts like ears, hands, fins, etc. In my opinion, it looks much neater & as a bonus, it is way less time consuming than sewing a bunch of smaller pieces on a larger piece (like fingers on a hand).
To start off, let's make two pieces. I made piece A in pink & piece B in green so you can see what I'm doing.
Piece A:
1. magic ring 6 (6) 2. inc x 6 (12) 3. (sc, inc) x 6 (18) 4-5. sc around (18) Fasten off. I like to leave a bit of a tail.
Piece B:
1. magic ring 6 (6)
2. inc x 6 (12) 3. (sc, inc) x 6 (18) 4-5. sc around (18) Do not fasten off. You can put a stitch marker in the last stitch so you don't lose your place while joining.
Joining the pieces:
At this point, some patterns may say, "sc 18 on piece A, sc 18 on piece B" - for the sake of this tutorial, I'm going to use this example:
6. sc 9 on piece B, sc 18 on piece A, sc 9 on piece B (36)
Sc 9 on piece B (the piece you're still attached to).
Put your crochet hook through the first stitch in piece A (the stitch to the left of where you fastened off) & sc in that stitch.
Next, sc in the next 17 stitches until you reach the stitch on piece A with the tail.
Put your crochet hook in the first stitch of piece B. Sc in that stitch.
Note: at this point, I personally like to pull the tail I left on piece A forward. When you join pieces, there's usually a bit of a gap left. If it's a flat piece (bunny ear, fin, etc), it's not really necessary to sew the gap. If the piece will be stuffed, you're probably going to want to use the tail to sew the gap together so the stuffing doesn't fall out. Next, sc in the next 8 stitches.
When you're finished round 6, you should have a total of 36 stitches & something that looks like this:
Click here for a tutorial explaining how to join three or more pieces.


